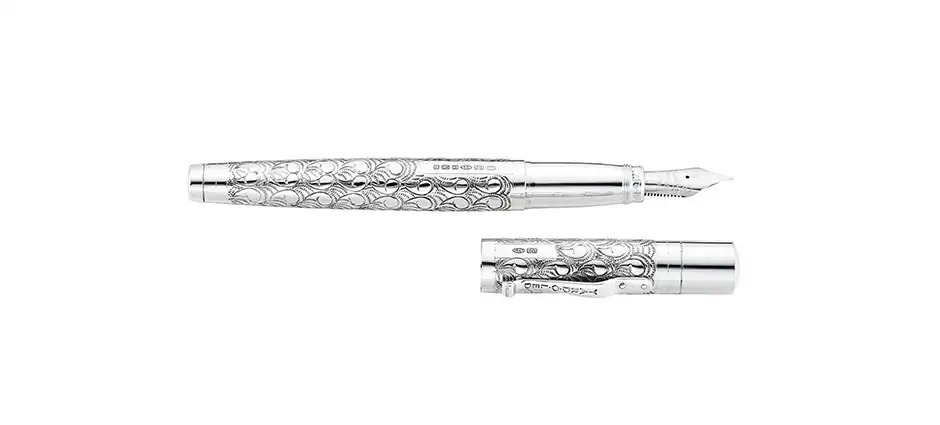
Why Reflective Surfaces Break The Normal Rules Of Product Photography
Most product photography problems are solved by adding more light. Reflective surfaces work the opposite way. Glass, polished metal, chrome, foiled packaging and faceted gemstones don't show you the light falling on them - they show you everything else in the room, including your softbox, your ceiling, your camera and, more than once in every studio's history, the photographer holding it.
The reason comes down to a simple piece of physics: the angle at which light hits a mirror-like surface is the same angle at which it bounces back out. Photographers call the zone where this happens the "family of angles" - the geometric slice of the room that a reflective surface can "see" from the camera's position. Anything sitting inside that zone gets reflected straight into your lens. Anything outside it disappears from the shot entirely. Once you can picture that zone, reflective product photography stops being unpredictable and becomes something you can plan for, shot after shot.
Control The Room Before You Touch A Single Light
Before any light is switched on, walk the space and remove anything that could end up mirrored in the product: bright clothing, coloured walls, cluttered shelving, even a laptop screen left open nearby. A red jumper six feet away can cast a faint but very real colour tint across a chrome watch case or a silver ring, and it's one of the most common reasons a "clean" reflective shot comes back looking subtly wrong on screen.
Close blinds, kill overhead room lighting, and work only with your controlled sources. Uncontrolled ambient light is the single biggest cause of unpredictable, hard-edged reflections on glass and metal, because it adds highlights you never planned for and can't easily remove later. A studio that's genuinely dark except for your rig gives you a blank canvas to build the reflection you actually want.
The Light Tent (Or "Cocoon") Method For Small Reflective Products
For jewellery, watches, glassware and anything else small enough to sit inside an enclosure, the light tent is still the most reliable starting point. Diffusion material - a purpose-built tent, a stretched bedsheet, or professional diffusion fabric - is wrapped around the product on every side, then lit from outside. The product no longer reflects the room; it reflects one enormous, evenly lit surface, which reads to the camera as a smooth, controllable gradient rather than a scatter of hard highlights.
A hole cut into the tent, sized just for your lens, lets you shoot from directly in front while keeping the camera itself outside the family of angles. For particularly demanding subjects - a faceted diamond, for example, where every tiny surface reflects at a different angle - some photographers go further and build a "tent within a tent," nesting a second, smaller diffusion layer close to the product for even softer transitions.
Negative Fill: Shaping Reflections With Black, Not Just Light
Diffusion solves half the problem. The other half is negative fill - black cards, flags or fabric placed just outside the frame to absorb light rather than bounce it. Where a tent gives a reflective surface something soft and bright to reflect, negative fill gives it something dark to reflect instead, and that contrast is what actually defines the shape of a curved or faceted object in the final image.
For products with a curve - a watch bezel, a bangle, a bottle - a technique sometimes called gradient reflection mapping takes this further: a printed white-to-black gradient is curved around the product just outside the frame, creating one continuous, sweeping highlight that reveals the object's form far more clearly than flat lighting ever could. Small adjustments to the position and curve of that gradient give fine control over exactly where the highlight falls.
Cross-Polarisation And When A Polarising Filter Actually Helps
A polarising filter, used correctly, removes glare from non-metallic reflective surfaces - glass, clear plastic, gemstones, ceramics and glossy card - because that particular type of glare is polarised light and the filter is built to block it. Pairing a polarised filter on the lens with a polarising gel over the light source (true cross-polarisation) goes further still, cutting surface flare almost entirely and revealing colour and detail that would otherwise be lost under a hot highlight.
It's worth knowing the limits, though: reflections on bare, polished metal aren't polarised in the same way, so a filter has little effect there. Metal is controlled through diffusion, negative fill and the shape of your light source rather than glass on the front of your lens - mixing up which technique belongs to which material is one of the most common mistakes in this area of photography.
Material By Material: Glass, Metal And Plastic Behave Differently
Glass needs to read as transparent as well as reflective, so backlighting - placing a diffused light source behind or below clear glass - is often used alongside a front fill to reveal form without losing the sense that light is passing through the object. Coloured or amber glass adds a further wrinkle, since it selectively absorbs certain wavelengths, which can shift under mixed lighting; keeping every source the same colour temperature avoids a muddy result.
Polished metal wants one large, soft plane of light with a clean, controlled transition to black outside it - the classic white-to-black gradient across a curved surface. Plastic sits somewhere between the two: glossy plastic behaves close to glass and responds well to polarisation, while textured or matte plastic scatters light more like a conventional product and needs far less specialist handling. Knowing which category a given plastic finish falls into saves time before the shoot even starts.
Focus, Framing And The Small Details That Undo A Good Set-Up
Autofocus struggles with reflective surfaces because it has no reliable edge to lock onto - it will often focus on a reflection floating inside the object rather than the object's actual surface. Switching to manual focus and checking sharpness in live view, zoomed in on a genuine edge, engraving or facet, avoids soft results that only become obvious once the image is viewed at full size.
A tripod matters more here than almost anywhere else in product photography. Reflective set-ups are usually built around a fixed relationship between light, product and camera, and even a small handheld shift can move the reflection enough to break that relationship entirely, forcing you to rebuild the lighting from scratch rather than simply reshoot.
Why This Matters Even More For Jewellery
Every technique above is amplified when the subject is jewellery. A ring or bracelet combines several reflective materials at once - polished precious metal, faceted stones, sometimes enamel or pearl - often at a scale of only a few centimetres, where the smallest change in light position has an outsized effect on the final image. That combination is exactly why specialist jewellery photography exists as its own discipline within product photography, rather than a smaller version of shooting a bottle or a box.
If your range mixes reflective materials across dozens or hundreds of SKUs, these techniques only pay off fully once they're applied consistently - see our guide to keeping a product catalogue visually consistent at scale for how a locked lighting rig and shot list keep every product looking like part of the same collection.
